Getting the Gears of you Maker Space turning
- rpickens
- Feb 18, 2021
- 5 min read
Updated: Dec 23, 2022
Every maker space is inherently unique just as the type of items/products or experiments you plan on building out. As a thought starter or possibly some inspiration here are some of my favorite Maker Space tools and resources.

When you're just starting out your maker space shouldn't be setup to start your first 1000 unit production run. It's not a small batch manufacturing hub nor is it meant to outshine a Fortune 500 companies prototyping shop. At the start, it just needs to be sufficient to help you create your first set of prototype products which will allow you to test and refine the product further.
If you are like me it can be a challenge to scale down your initial shop but it's absolutely crucial that you scope out your 1 year target outcomes from creating this space before you start dreaming up a colossal mega shop with more equipment that you'll ever use in the next 12-18 months. Start small and grow over time.
My Maker Space - AKA - My Product Innovation Lab - PI Lab for short
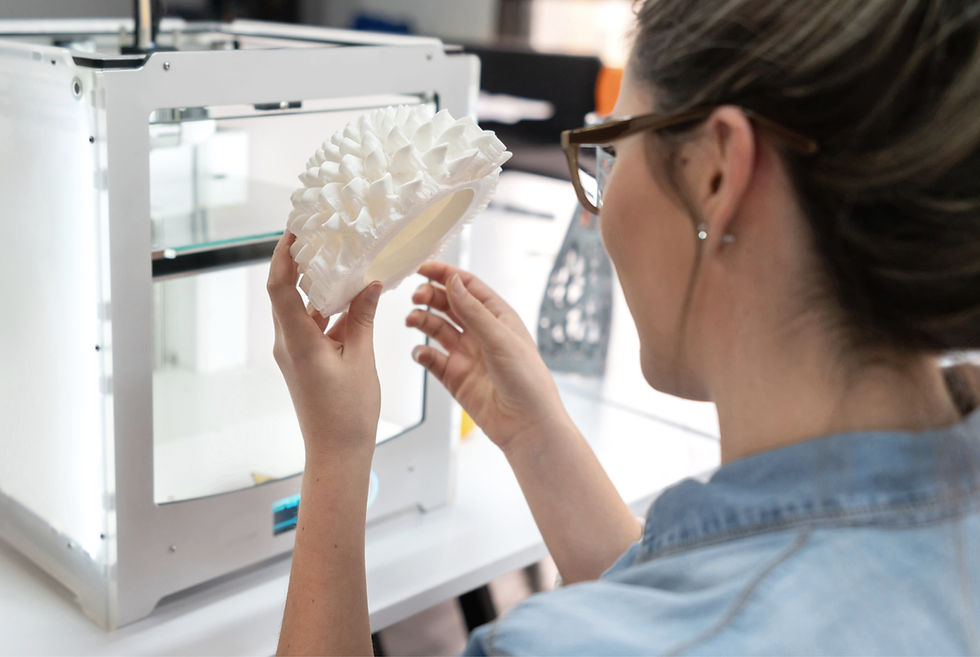
The major focus of my Maker Space was around rapid prototyping, high quality items in the most cost effective and efficient way possible. Outsourcing 3D prints was nice at first but once you're serious it's worth investing in the right equipment to build on your momentum. It should both save you time and money in the long run having your own equipment. Let's dive into the specifics of what I selected and why...
Hardware:
Initial Goals - I wanted to build physical products ideally in multi-color arrangements with near production or at production level material toughness and rigidity.
After trying out and returning half a dozen 3D prints (thank you Amazon for the great return policy) I found the premier 3D printer that I consider a Pro-sumer level machine. What really sets this printer apart from other printers in the sub-$2,000 range is the following.
3D Printer - Prusa Mk3S

1. The Remove-able PEI heat-bed that also magnetically attaches to the base plate is a extremely useful. I never scrap prints off of the build plate; I simply remove the build plate most of the time since I print primarily in PETG they just pop off from the plate. If I'm using nylon or PLA then I might need to slightly bend the build plate and it breaks the prints free 99% of the time. Its durable and just simply lasts which isn't the case for many of the printers in this category.
2. A host of Great Features that when combined create a really nice user experience. These would be the Filament detection sensor which prevent you from running a print through the night without filament on the spool. Once it notices the lack of filament it stops and lets you know it needs a refill. Once you've added more it continues on with the print like nothing happened. The mesh bed leveling and the ambient temperature drift compensation. Once you've used these features any printer that doesn't have them will seem like amateur hour just started. Then there is always the multi-material print add on that can expand your printer to be able to create 5 different color models.(the only catch is it works best with PLA. I was interested in using this for PETG but its not really geared toward that material. After learning that the hard way I've included my recommendations for a versatile multi-material accessory below.)
3. The Prusa Slicer program is simply the best i've seen both for beginners but also for the advanced users. It's intuitive and easy to modify parts prints on the fly. To speed up the print you can change the print resolution at varying parts of the design. This way you can have the key features of the model in hi-res while the standard body can be done in a lower-res that prints 5x faster. When you're bringing in parts from all around the web and meshing them together in a new file things in the model can get corrupted or create unbuildable interfaces. With the Prusa Slicer it 99% of time auto-corrects those issues and you just have to click print.
Bonus Reasons - You may not think you need an open source 3D printer but it's actually really nice to have an active community that can support you on different projects and its nice to know overtime this design will have robust updates to keep it on the cutting edge.
Formlabs Form 3
If you're looking for parts with a layer resolution that is near perfect and could easily have parts that pass for production level quality then maybe a Low Force Stereolithography (LFS) machine such as the Form 3 is something worth considering. You'll have 25um xy resolution, 25-300um layer thickness with a build volume of 14.5 x 14.5 x 18.5 cm. I don't personally have one of these machines for reasons detailed below. However, for the right use case, centered around super high-res print quality, this could be the perfect machine. The functional material options for this machine are growing rapidly increasing the potential use cases so stay tuned to see how these systems change the game in a few years.

RJ's 3D Printer Recommendation - For a much lower upfront 3D printer price-tag along with lower cost prints, with near production level print robustness I would recommend a FFF machine such as the Prusa Mk3s. The tradeoff is in the print resolution, Stereolithography machines are generally superior in this area so your product use-case will likely define what would be best in this realm. If you don't need the large format Prusa Mk3s build volume of 25 x 21 x 21 cm or (9.84 x 8.3 x 8.3 inches) but you'd like the same high quality features of the Mk3s then the Prusa MINI with a build volume of 18 x 18 x 18 cm ( 7 x 7 x 7 in) is the way to go. I wanted to flexibility of the larger build plate but both are solid machines!
Palette 2S - Multi-material 3D printer Accessory

This little box turns any single filament 3D printer and turns it into a 4 color multi-material printer. No additional software or connections are needed to get this up and running with any FFF printer you may have.
The Palette 2S Pro is on the slightly expensive side but if you need a robust way of creating consistently beautiful multi-material prints this is the way to go. For my designs I'm predominately using PETG and its been flawless on every print. Do you don't have to worry about colors bleeding into the wrong layers or filament strings messing up prints. It just simply works, every time.
What's also a killer feature of this system is the software that lets you upload a STL (3D printer file) that is single color and with the use of a paint brush you can create the color layout that you would like to see. Its can be as detailed as your printer's resolution so its perfect for every design you can think of. Considering that 98% of the designs available to download are single color this is a really nice feature to quickly get your designs setup as 4 color masterpieces.
RJ's Multi-Material 3D Printer Accessory Recommendation: The Palette 2S/2S Pro and SW bundle are the top of the line FFF multi-material accessory. If you're ready to buy one you will also notice the Canvas Hub (connected gateway) that they try to bundle with the unit. As longer as you're ok taking an SD card and running it between your PC to your 3D printer and the Palette then pass on that cost adder. The only exception is if you had workshop full of Palette's running with half a dozen printers then the connected IoT type interface could be nice addition but that wasn't necessary for me.


Comentarios